Monday, March 31, 2008

Coca Cola Chicken

Coca Cola Chicken

TeeHee~! It's Sunday again. We usually stay home for dinner on Sunday and i'll get to test my skills on cooking.

The Chef : Dumb-Baker

The White Rat : Dumb-Baker's BB...wakakakaka

Dish of the Nite : Coca Cola Chicken
Accompaniment : Pan fry fish ( i have no idea what is the name of this fish ) + Self creation "Loh Hon Chye"
Something to digest : Stir fry "Choi Sum" + Stir Fry Lady's Finger w/ dried shrimps & chili.
Soup of the Nite : Old cucumber with anchovies + dried scallops + dried cuttlefish + dried oyster

This Coca Cola Chicken....the first time i tasted it was in Calorie's Cafe in Sri Petaling. The taste is between Sweet and Sour Chicken & Honey Baked Chicken. Last week, i saw a 1.5L of unopen bottle of Coca Cola sitting in the fridge. Then suddenly i had this 'bulb' in my mind...ha...i'm gonna make my own version of Coca Cola Chicken.

To be honest, i have no idea on how to prepare the chicken. I have not google any websites and have no seek any advice from other great cook. This is my experimental dish...if you are bold enough to try it out, please...my pleasure :> I find the chicken a bit too sweet...maybe i should reduce the amount of coke next time. Other than that, i thought it was yummy. The white rat commented that the chicken is a bit too sweet...other than that, it's fine......Yay! My experimental chicken is not going to the trash bin! Applause! Applause!

What you need :
1 chicken breast (cut into small pieces)
a small knob of ginger (thinly sliced)
some chopped onions (i chopped half of a big onion)
1 tbsp of dark soy sauce
1/2 tbsp sesame oil
dashes of salt and pepper
1 1/2 cup of Coca Cola (you might want to reduce to 1 cup)

What you need to do :
Combine all the ingredients together and leave it marinate in the refrigerator for at least 1 hr. Heat some oil in the pan/wok. Using chopsticks, pick out the chicken into the wok. Stir fry for about 2 minutes on medium fire. Pour the remaining liquid into the chicken and simmer for 20 minutes with lid covering the wok. Stir occasionally. Thicken the sauce with cornflour and let it simmer for another 5 minutes. Dish it up and serve hot.

Variations of Soft Buns

Yipee! It's bun baking time again. I love it when it's Friday...cuz every Friday after work, i'll always head to the supermarket first before going home. I shall then load my car with flour, butter, etc...depending on what i want to bake that night.

So on Friday night, i made these sweet buns adapted from Florence's Wonderfully Soft Bread recipe. When it comes to buns, SAUSAGE BUN is a MUST in my list. Arms with all the ingredients and other 'ka changs' (utensils), i started the bun baking journey around 8pm.
Using Florence's recipe, i dumped all the ingredients in my breadmachine and set it to dough cycle. During the 1st few minutes to mixing, i used a plastic spatula to scrap down the sides on the pan to ensure well mixing. After the kneading cycle (my breadmachine took about 1.5hrs), I did a proofing test on the dough. To ensure the dough is well proofed, press the dough with your pointer, the indention should stay a while and draws back very slowly to its origin state. Otherwise allow the dough to proof for another 20 minutes or so and perform the same test again.

Bring the dough onto a lightly floured surface, punch out the gas from the dough and knead and shape as you desired. Rest the dough for 15 minutes before baking them in oven. I varied the sweet buns to Cinnamon Buns & Sausage Buns.

Verdict : True to its name...WONDERFULLY SOFT BREAD!!! Very soft and fluffly...boy oh boy...it stays soft even the next day! Like what Florence said, if you are a bread lover, this is definitely a must try recipe!

These babies came out fresh from the oven at 10:30pm...though it was a long wait, the end products definitely put a smile on your face ;>


Note : The dough was kinda sticky when i brought it out from the breadmaker. I had to add the plain flour bit by bit to keep the dough out of my palm. But as you knead the dough, it will somehow become more managable and un-sticky.


Left : Dough Proofing in the Breadmachine

Right : Mini Cinnamon Rolls and Sausage Buns-

Friday, March 28, 2008

Healthy Drink

The other day i saw this Health Drink post in my cousin's blog page. She actually made this Enzyme drink by slicing the fresh fruits thinly and stack them up in a glass container. The fruits are finally topped with chunks of palm sugar before sealing the container tightly and have it stored in a cool dry place. This container of fruits will be fermented for about 2 weeks before consumed. I am not really sure if you drink the concentrated enzyme drink itself or have it diluted with water as i have yet to experiment the recipe itself. This enzyme drink, if you do google about it, is somewhat a natural healing therapy for our body systems. It helps us to expel the toxic in our body and generally improves our digestive system. The Enzyme drink is also available in the leading pharmacies.

Taste wise, some people claim that it's yummy while some claim that it's sour. One of my close friend commented that she will not even try to taste it as she's afraid of being intoxicated!! (since it's fermented). I personally have not tried the drink. However, I'm bold enough to give this enzyme drink a try and i shall update the enzyme drink post soon.

For the time being, do visit here, here and here for more info. Cheers~!

Thursday, March 27, 2008

Basic Muffin

Top right : Corn muffin ; Bottom Right : Peanut Butter Choc Chip muffin

Sorry for not updating recently as dumb-baker was ill for a few days. To resume my blog posting, i'll start with a basic muffin recipe. I have this thick baking book by King Arthur Flour collecting dust in my cabinet. The reason why i didn't use this book is because i personally indulge more in home-baked-and-tested kind of desserts/snacks rather than the commercially written recipe in a book. But something just propelled me to look through this thick book of mine and try my luck on one of the recipe. As it was already past 8pm, i thought i should just resolve to bake something easy and simple....and no messy cleaning of course. And here it is, the All Star Muffin recipe. This muffin, oooo let me tell you...super soft in texture!!!! Its sweetness is just right for my tastebud and this basic muffin is really soft and fluffy.

Having baked the vanilla muffin for so many times, i decided to do a lil twist to the recipe. After making the basic batter of the muffin, i divided the batter into half. I added peanut butter with chocolate chips to one half of the batter and added creamy corn with extra frozen corn to the other half of the batter. The peanut butter muffin is such a kick! In every bite of the muffin, you'll be able to taste the flavorful peanut butter....not forgetting about the choc chips too! As for the corn muffins, ah ha...though it's not as good as Kenny Rogers corn muffins....but it's good enough to be graded as Yummy.....well...judging from my dad's quick chomped down muffin reaction after i had taken out the to muffin cool on the dining table. Anyway, to cut the story short, here's the recipe :

All Star Muffin (yields 8 muffins)
  • 4 oz. butter
  • 1 1/2 cup of sugar
  • 2 medium size eggs
  • 1 tsp of vanilla essence
  • 1/2 cup of sour cream (i substituted with 1/2 cup milk + 2 tsp lemon juice)
  • 2 1/2 cup of self raising flour
  • 1 tsp of baking powder
  • 1/2 tsp of baking soda
  • 1/4 tsp of salt

Method

  1. Cream butter and sugar till light yellow in color.
  2. Beat in eggs to the butter mixture, one at a time. Scrap down the sides of the mixing bowl to ensure well mixing of the ingredients.
  3. Add in vanilla essence followed by the sour cream. Mix well. (pic 1)
  4. Sift in the dry ingredients (self raising flour, baking powder, baking soda and salt) to the wet mixture. Mix well using low speed of the mixer for about 1-1.5 minutes. (pic 2)
  5. Scoop mixture into the paper cups until 85% full. Bake in preheated oven of 175 DC for 20-25 minutes or until cooked.

Notes:
  1. I divided my muffin batter into half.
  2. For peanut butter choc chip muffin : I added about 100g of peanut butter (i used the crunchy peanut butter)and half cup of chocolate chip.(pic 4)
  3. For corn muffin : I added about 1/2 cup of creamy corn + 3 tbsp of extra frozen corn. (pic 3)

Wednesday, March 26, 2008

An Ooomph For the Constipated Days

Ever since i had a drastic change of weight, my body system has somehow 'given up' hope on me. I am always feeling cold and my mood swings are even worse than the weather. Haha! (thx bb for being patient with me). I'm lucky to have a lot of family members and friends who showered me with endless care and concern. During my 'weak' period, i am introduced to many types of food supplements and nourishing soup to restore back my body system. I'm pleased to announced that I am now feeling much much better and healthier.


But....


My digestive system remains at the poor stage. Many of us suffer constipation in silence....i mean who-lah will rip off their dignity and practically brag about his/her not-so-smooth-toilet moments to the public. Despite having consumed vast amount of food supplements and fruits, something in my body system that will just resist me from visiting the toilet. However, few weeks ago, i discovered my very own disgestive theraphy. To date, this theraphy stays effective on me. Give this a try, might works well on you during your constipated days :)


1. Make a cup of Nescafe first thing in the morning. Leave it to cool to room temperature (about half an hour). Drink it on empty stomach.

2. Have a slice of wheat bread loaded with bananas after the coffee.

Saturday, March 22, 2008

Almost Vegan Coconut Cake.....


I have never been vegetarian in my life until 2 years ago, whereby i started to follow my bf to the temple. Besides weekly prayers and chantings in the temple, i am also required to practice vegetarian on every lunar 1st and 15th of the month. In the beginning, i felt a bit uneasy to omit meat in my meals (though it's only for a day)...probably due the carnivorous genes in my family. But as time goes by, I begin to appreciate the V term in my life. There are literally tens of pages/webs if you Google about the pros of being a vegetarian. In my point of view, though it's good to practice vegetarian, I don't see any harm of having meat in your meals as long as the intake is in moderation.

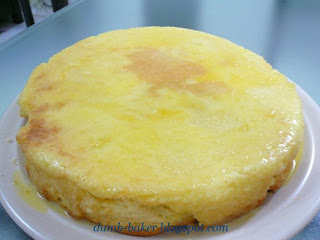
Yesterday, as i looked through my recipe collection file, i saw this Coconut Cake recipe. This recipe was actually meant to be a vegan recipe, but i substituted one of the ingredients and so, I renamed this recipe as Almost Vegan Coconut Cake. If you like coconut, you'll definitely love this cake. It's moist, a little crunchy texture, and most importantly, the aroma of the coconut milk which played an important role in this vegan cake. Oh, don't get turnoff with the tofu in the ingredients...trust me, you won't even know it's actually there in the recipe as u consume the cake.

The only drawback of this cake is that i find it a bit too sweet for my taste bud. You may want to reduce the amount of sugar if you are health conscious or an-absolute-growing-waistline-hater.

Recipe (yields a 9 inch pan)
  • about 120g of soft tofu
  • 1 cup of coconut milk
  • 1 cup of dessicated coconut
  • 1 1/4 of cup sugar
  • 1/2 cup of vegetable oil (i substituted this with melted butter)
  • 2 1/2 cups of self raising flour

Methods

  1. Combine tofu, coconut milk, dessicated coconut, sugar and oil in a food processor. Blend thoroughly to a thick puree texture.

  2. Sift the self raising flour in a mixing bowl.

  3. Pour the thick puree into the mixing bowl of flour.

  4. Mix with spatula until well combined. The texture of the cake mixture will be rather thick and heavy.

  5. Pour the cake mixture into a prepared lined baking pan. Smooth the top layer of the cake mixture.

  6. Bake in preheated oven of 175 DC for 50 minutes or until cooked.
Step-By-Step Photo Illustration

Wednesday, March 19, 2008

Rice Cooker Pot Chicken Rice

OK, I don't have a claypot at home. My family can never get a decent claypot....there were a few times when we bought the claypot, they are always leaking or defective in certain places. Hence, mom said, "don't waste the money to invest on claypot anymore". Any advice on where i can get a decent-no-leakage claypot?

So no claypot....how to make claypot chicken rice? Ah ha....rice cooker may be a good replacement. It's pretty easy to make an almost-hawker-stall type of claypot chicken rice. All you need to prepare is :

Ingredients (for 2 persons meal):

  • 2 chicken thighs, chopped to bite sizes


  • 2 waxed meat (chinese sausage), sliced abt 5mm thick


  • 3 presoaked mushrooms (sliced thinly)


  • two small onions, finely chopped


  • about 2 cm ginger, finely chopped


  • 2 cups of rice, thoroughly rinsed


  • 2 cups of water


  • some finely chopped fried salted fish + chives for garnishing (optional)

Sauce for marination : Oyster Sauce + Dark soy sauce + Light soy sauce + Chinese cooking wine + dashes of black pepper (I've prepared the sauce in my own estimation...so no exact measurement)

Methods

  1. Marinate the chopped chicken thighs with sauce overnight.

  2. Lightly oil the wok and sauteed the onions and ginger till fragrant.

  3. Add in chicken thighs, mushrooms and waxed meat and stir fry them for a good 2 minutes over medium heat.

  4. Add in rice and water to the wok, continue stir frying for a minute.

  5. Turn off the heat and transfer everything from the wok to the rice cooker pot.

  6. Set your rice cooker to 'cook' and allow 8-10 minutes to keep warm before serving.

  7. Garnish your plate/bowl of chicken rice with chopped chives and salted fish as you desire.

Now, I do have a rice cooker at home but KO-ed last week. So what i can utilise is just the rice cooker pot. *Panic* No rice cooker...sei lor....a minute after ransacking the kitchen's cabinet, i found this super huge pot. Ha! I can do it in a conventional-rice-cooking-way.....maybe. After transferring the kinda-raw-chicken rice to the rice cooker pot, i had the pot sit over an inch of water in the huge pot. Put the lid over the huge pot and let it 'steamed' over medium fire for 35 minutes.

My other half said the rice seemed to be a little too soggy....i guess i have over steamed the rice...but can't blame me, this is my first time cooking rice over the stove k. *pout* Having said the rice is soggy, my other half actually helped himself with 3 bowlfuls of rice...could it be because he's my ever supportive fan or because the rice is yummy despite soggy? Haha...try out the recipe yourself and you'll be the best judge :)

My version of rice-cooker-pot-chicken-rice

Tuesday, March 18, 2008

I have a Dream....

No. I'm not Martin Luther King.

My laptop shows 5.30pm, 15 minutes later i can start counting the OT payment. *Smack* Wake up..stop dreaming and stop the bull**** about OT k..

IKO oatmeal cookies. Ah....this is my dream

Trespasses my brain and glue itself there, my god....why must it happen today after my binge eating on cookies last night?


Oh boy! I'm going to get myself IKO cookies after work tonight. Yes...it's final and i'm getting the cookies. Cheap. Healthy. Yummy. My other half will probably start the grandma's nagging about me taking too much junkies if he finds out i'm not taking proper meals...bb, if u r reading this, i'll cease eating junk foods for a month if you do the cooking for Sunday's dinner for a month. Good deal?

Sausage Buns

Fellow friends and visitors, guess you guys know that i'm a bread and cookies maniac. And so, if i'm such a great fan of starch, how could i miss the fun of baking breads and buns rite?? Of all buns, sausage buns remain at the top of my list. Whenever i visit the bakery, the first thing i look for is sausage buns. I like it when the buns are ultimately soft...unlike some of the burger buns which are dry and crumbly (well not all, but most of the burger buns i've eaten are dry in texture).

So, i googled my favorite sites for an ultimate soft bun recipe and this is what i found. Ooo lala....after reading all the comments from the visitors, i can't wait to try out the recipe. This recipe yields me wonderfully soft buns and it's really delicious. The buns remained soft even until the next morning....! Another plus sign for me to bake buns is that i owned a breadmaker machine....i don't hafta go thru the tedious job of kneading and proofing and kneading again....just dump everything in the breadmaker..turn on the switch and wait for 1.5 hrs to shape the buns in your own preferred way...now, is there any reason that will withhold me from baking buns? DEFINITELY NOPE :P

Ladies & Gentlemen : Let me present you the Ultimate Soft Gigantic Sausage Buns

Monday, March 17, 2008

Sui Kow & Kow Zi

My other half is an ardent fan of soup based 'sui kow'. Each time we go out for 'wantan' noodle meal, he never fails to ask me this :

bb : Gg, you want sui kow?
me: Dun wan la.
bb : oklor (sounded disappointed...but....)
[waiter came to our table to take our order]
bb : 2 plates of wantan noodle and 1 big bowl of sui kow

despite me not eating the sui kow with him, he will still continue order a bowl of it.

So, on Friday night, i texted him this :
Don't eat breakfast alone tomorrow. I'm gonna stuff you mouth with food i'll be making tomorrow morning.

Haha...i'm one abusive girlfriend on earth.

So, woke up as early as 630 in the morning and begin my mouth-stuffing-food project.
For Sui Kow:


I had the minced pork marinated overnight with sesame oil, dark soy sauce, light soy sauce and dashes of black pepper. I'm sorry i can't list down the precise measurements of ingredients as i've prepared everything in estimation...in other words...agak agak version :P Next, shelled the shrimps, seasoned them and rinse them under running water...this method will actually yield a 'springy' shrimp! I've also cut some black fungus into thin strips and add them to the pork mixture before making the sui kow. To assemble, firstly, take a piece of sui kow wrapper (similar to wantan wrapper but in circular shape), lay a piece of shrimp and top with the pork and black fungus mixture. To seal the sui kow, dabbed the corner of the wrapper with water and seal it. I've made a pot of anchovies soup and added some 'tung choy' (salty preserved vege) to compliment the soup's taste. Dump the nicely wrapped sui kows into the pot of boiling soup. The sui kows are ready when they float onto the surface of the soup. Serve the sui kows hot and compliment with some cut cili padi......oooo syiok!

For the kow zi, i've adapted the ingredients and methods for the skin here. For the fillings, I had 1 jicama/sengkuang/chinese turnip and 1 carrot shredded thingly. I've also sliced 3 presoaked mushrooms thinly. Lightly oil your in a pot/wok over medium fire and stir fry the fillings until semi soft. Add in dark soy sauce, soy sauce, some salt and pepper and some sugar to the fillings and continue stir-frying for a minute or two. Again, the seasonings i've added to the fillings are all estimation. You may adjust the seasonings according to your taste bud. To assemble the kow zi, take a piece of prepared skin for the kow zi, put the fillings and wrap the kow zi in your own preferred shape. Remember not to overload the skin with fillings or have the edges of the skin came in contact with the liquid from the fillings....otherwise you'll have a hard time sealing the kow zi or worst still, you may end up 'patching' the holes of the skin..hahaha! Finally, arrange them in a tray and steam over boiling water for 15 minutes or until the skin is translucent. Serve hot!

Here's my version of sui kow and kow zi....TADAAAAAA......enjoy!


Kow Zi

Sui Kow in anchovies soup with some green vegetables

Lemoney-lemon cake

The Lemoney-lemon Cake

Crap...lemoney lemon...i wonder if there's such word. Hehe.

OKay....here i go with my baking utensils...all set to bake my first ever lemon cake. ON first thought, i hesitated a while to bake this cake because :
1. This recipe calls for sour cream (after searching high and low in the fridge, i do not have sour cream)
2. This is supposed to be a sour but not too sour, sweet but not too sweet, kind of cake...
3. The lemon glazing...ah ha...i dun usually make glazing for my cakes but i supposed this lemoney lemon cake will definitely taste better with the glazing.

After minutes of indecisive moments, i finally decided to give it a try...fingers crossed, hopefully the cake will not turn out bad (as this cake is supposed to be given to my relatives who came from Singapore for a short holiday).

Ngek Ngek Ngek... all you peeps and folks, this cake is a blaster! The texture is right, the taste is right, everything is just right, despite the absence of the sour cream.

Ingredients

  • 1 block of butter

  • 3/4 cups of sugar

  • 3 eggs

  • 2 cups of self raising flour, sifted

  • 1 teaspoon of salt

  • grated zest of a lemon

  • 1/2 cup of sour cream (I substituted the sour cream with half cup of low fat milk and juice of half a lemon)

Glazing : Mix slightly less than half cup of icing sugar with 3 tbsp of melted butter and 2 tsp of lemon juice


Methods

  1. Preheat the oven at 180 DC.

  2. Cream butter and sugar in a mixing bowl till light and fluffy.

  3. Add in eggs to the butter mixture, one at a time, beating well after each addition.

  4. Add in sifted flour and salt to the mixture and continue mixing for 1 minute.

  5. Scrap down the sides of mixing bowl with a spatula, add in grated zest of lemon and pour in the sour cream.

  6. Continue mixing for another minute.

  7. Pour the mixture into the lined baking pan. Smooth the surface with a spatula before baking the cake in the preheated oven for 40 minutes or until a skewer comes out clean after being insert in the cake.

  8. Leave the cake to cool on a wire rack overnight.

  9. Next morning, prepare the glazing and spread them generously on the cake before chilling the cake in the fridge for 15 minutes.

Cornflakes Cookies


This cookies never fail to attract my attention especially during CNY. Even after buying tubs of them from the night market, me, being greedy, will definitely bake tubs of this cookies too. I just enjoy munching them as they are real crunchy and they are really addictive. So if you are watching your weight, it's wise to take of an amount of cookies that you wanted to eat on to a plate instead of grabbing a tub of cookies and munching them while watching the TV.

Okay...let's get started with the easy peasy recipe...yippee!!!

Ingredients

  • 450g of butter
  • about 550g of plain flour, sifted
  • 1 egg
  • 1 cup of castor sugar ( i used only 3/4 cup of sugar)
  • about 2 cups of cornflakes, crushed lightly

Method

  1. Cream the butter and sugar with a mixer until the mixture turns pale yellow.
  2. Add in the egg and continue mixing the mixture well, scrap down the sides of the mixing bowl to ensure the mixture are all mixed well.
  3. Put the mixer away and pour in the sifted flour in the mixing bowl.
  4. Now, with clean hands, start mixing the flour mixture to form a dough. If you find the dough too sticky to handle, add more plain flour to the dough.
  5. Take a pinch of the dough and roll into a small ball with your palms. Continue this process with the rest of the dough.
  6. Roll the balls of cookies into the bowl of crushed cornflakes and place them on a baking tray lined with baking sheets.
  7. Bake in preheated oven at 180DC for 20 minutes or till golden brown.


The greedy me chomped down 4 cookies immediately after taking out the tray of cookies from the oven and needless to say, i burnt my tongue. Haha...i mean, how can you resist these mout-watering cookies when the aroma of these cookies engulfed the whole house of yours while baking in the oven? Certainly not me!


The above recipe yields me 1 big and 3 small tubs of cookies

Monday Blue

I DO NOT LIKE MONDAYS UNLESS IT'S A HOLIDAY.

gosh...i'm missing my smelly bolster already...

Friday, March 14, 2008

This is for you Bro!

I'm one lucky shortie gal who's blessed with a humorous little bro. He's the one who can make you feel top of the world when you thought your world is falling apart, yet, he can be a pain in the ass at times to you....
Scene #1
me : Oi babi, get up now. Made you breakfast already...after breakfast let's go kai kai
bro : mmmmm
[after 30 minutes.....]
me : Oi!!!!!! It's almost 1 pm already...get ur ass up now!
bro : mmmm
me : Faster la.....i'm all prepared liao...i want to buy something at XXX mall later...
bro : aiyo...you go urself la...tired la
me : what??? i thought we agreed to go shopping later
bro : yala...but i want to sleep...you go urself la

Scene #2
bro : oi, i want to watch football match oledi...pergi bela...[trying to snatch away the remote control]
me : NO. I AM WATCHING THE DRAMA HALFWAY.
bro : faster go away la...it's starting soon oledi...[pulling me up from the couch]
me : aiya wait la...it's going to end soon liao [sat back at the couch]
bro : now you go or not? if u r not moving now you'll regret...dun say i didn't warn you beforehand
me : [silent and remained glued to the couch and holding tightly to the remote control]
..........*bro stood with his butt right in front of my face*....
me : oi....move aside
[still standing in front of me.....suddenly *loud fart*]
me : !@#$$%%#$%&^ kanasai you [quickly ran away]
bro : haha...told you so that you'll regret!


My bro and I are 2 years apart.
WHen we were young, we used to fight a lot...but within 10 minutes, we are one happy bro sis again. My bro was one of the typical mischievous kid when he was young. He played with lighter when no adult is around and it didn't stop there. He was just too keen to know what could a lighter do and he practically carried out the 'test' on the big furry dolls at home. Suddenly he came running to me, "Je! Je! Look...the fur is black black now "(pointing at the burnt part of the doll)....."WHAT DID YOU DO???" "i play fire and burn it accidentally...looks like toast bread hor"
*faints*
Then came the early teenage years....he was one fatty boom boom and he always 'sapu' all my unfinished food and still craving for more after that....but when he turned 16, i guess he was feeling self conscious....he practically just stop taking supper, had a bowl of rice instead of 3 for dinner, constantly craving for veges instead of fried chicken [yes...he was one of the KFC's maniac].....and suddenly he became just too skinny! People were shocked, his teachers were shocked...everyone were shocked!
and he proudly pulled me aside and told me this "see, people calling me handsome boy now instead of fatty....but you...you are still the shortie...HAHAHA!"
Stepping into college life, he became so vain that he will just buzz your ears like 'lalat' with questions like "hey je, how's my hair?" " hey je, my face hor, the pimple very obvious ar?" "Oi babi, take picture at proper angle la....must focus on my less-pimple-appearance face ma" "hey je, do i look fat in this attire?"
I must admit, he became a total transformed man. He's now much more matured, polite, totally not hot tempered anymore, always making sure the people around him are in good condition and most importantly, he showers me with a lot of care and concern and practically taking me as his little sis instead of elder sis.
He's one guy that i can never live without and he's one guy i'll always love forever.
Take good care 'fei chai'...you are the best bro ever!

Me & my bro ;>

Thursday, March 13, 2008

Teriyaki Chicken Wings


I was inspired by my cousin sis in law [who is truly a good chef & baker], Sue Sue, to make this dish. True enough, this is really finger licking good! Plus, it's really easy to prepare and no messy clean up too!

Since i get home earliest by 7pm after work, i had my mom to do the baking part so that by the time i'm home, we can all have dinner together. Probably there was a slight miscommunication, my mom set the oven temperature to 200 DC and baked for a good 40 minutes......and by the time i'm home, i quickly ran to the dining table to check out the chicken wings my mom had prepared.

First sight...."MA!!!!! WHAT HAPPENED TO THE CHICKEN?? WHY SKIN BLACK BLACK 1?? DID YOU BAKE THEM AT 180 DC FOR 30 MINUTES? DID YOU PUT IN ALL THE LIQUID LEFTOVER FROM THE MARINATION PROCESS?"

This is what my mom replied...." HA? MUST PUT IN ALL LIQUID 1 AR? OOOO I DUNNO MA...NEVER MAKE 'GUAI LOU' DISH B4....YOU SAID 180 DC FOR 30 MINUTES MEH?"

haha...nevertheless, the wings were still yummylicious despite the partly burnt skin...

Thanks a lot ma!

Try this recipe and i'm sure you'll enjoy them as much as i do!!!

Nescafe Anyone?

I bought a new version of premix Nescafe (Nescafe Gold) recently, it claims to have richer aroma and better taste. I had a second thought of buying it as it cost more expensive than the regular 3-in-1 nescafe. But since it claims to have richer aroma, heck, just buy it and try.
Immediately after settling down my things in the office one morning, i made the new sachet of nescafe in no time. First sip, eei, why no taste 1? Okay maybe i didn't stir well enuf [stir stir stir....] Second sip, hmm, why still no taste 1? I added only half cup of hot water to a sachet of the premix coffee, shud be flavorful ma!
I downed the coffee in 5 minutes and made myself a new cup of coffee...this time i made the regular type of Nescafe 3-in-1. Boy oh Boy...now this tasted much much much much much better. This is the coffee that will make my day....everyday without fail i will drink at least 2 cups of coffee to maintain my sanity [work is killing me at times]. If i'm feeling gloomy, an extra teaspoon of nescafe granules to the premix nescafe will lit up my face too!
I always get this comment that i'm downing too much coffee and it will adversely affect my health or it will irregulate my rest hours if i drink coffee at night because of it's caffeine....but somehow, i find that it is not irregulating my sleeping hours even if i have a cup of coffee at 12 midnight.
For me, if i'm tired, i can sleep at any time, with or without caffeine. As for health wise, yes, once i visited a doctor, and he said women shudn't consume more than 2 cups of coffee per day but only if u r planning to conceive a baby soon.
As for now, i'm not married and not planning to have baby soon, an additional cup of coffee for my day wouldn't do any harm rite?


Has anyone tried this?

Wednesday, March 12, 2008

Low Fat Brownies

I used to not like chocolate, not hate but i just don't favour them. However, sudden change of wind! I am not sure which vein / blood vessel / hormone of mine made me had the sudden urge and crave for chocolates. It was so bad that i had to 'sneak' some time from office hours and google for the best brownies. I just had to bake and sink my teeth into the brownies that night! Phew! My mom was nagging me "Why don't you take your dinner first before you start your baking project?" "No ma, i just want brownies right now...(talking while munching a bar of Snickers)"

OKay, enough of my nonsense. I was lucky that i found this low fat brownie recipe. Yes you heard me ladies.....LOW FAT.....i had a moment of hesitation when i stumble across this recipe..Low fat brownie? Will it taste as good as ordinary brownies? Nevertheless, i gave it a shot and boy! GOd must have answered my prayer! It was so delicious that you will start chomping on them....best of all, you won't have to worry sick about the calories consumed later! Ngek Ngek...so ladies at home, give this recipe a try and gentlemen, try to persuade or convince your other half to bake this lickalicious chocolatey brownie for you...trust me you'll love it.

Here's the recipe. Enjoy!


Brownies baking in the oven


....End product...


*Note: I actually increased the amount of cocoa powder and decreased the amount of sugar. I personally favor bitter sweet type of chocolate snacks instead of just plain sweet chocolates. I also omitted the frosting.

Tuesday, March 11, 2008

Eppi Birthday Rachel

It's Rachel's birthday, thus i decided to surprise her with these cupcakes at work tomorrow! Hope she likes it!

Freshly Baked Vanilla Cupcakes


Umm...forgive me for the ugly frosting...they actually read
" Epi 22nd bday"
Vanilla Cupcake (yields 12 standard cupcakes)

Ingredients:

  • 150g butter
  • 150g castor sugar
  • 175g self raising flour
  • 3 eggs
  • 1 tsp vanilla extract

Methods:

  1. Cream butter and sugar in a mixing bowl till light in color.
  2. Add in eggs to the butter mixture, one at a time and mixing it well after each addition.
  3. Add in vanilla extract and mix well.
  4. Fold in sifted flour and mix until just combined.
  5. Pour mixture into prepared paper cups and bake in preheated oven at 175 0C for 25 minutes.

Mom had a hard time guessing the words on the cupcakes. Her guess was E-P-I ???? A-L-O-Y. I think i need to improve my decoration skills a lot. This is truly embarrassing...haha!

My First

Elo elo!

A little bout myself. A short gal with a lovely family & BB, who has the passion for baking and baking and baking....well sometimes cooking...mm kay...and has an ultimate soft spot for buns and cookies.

Conversation #1

me : b, can we go in this bakery?
Bb : ha? bread again ar?

Conversation #2

me : ma, please buy bread on your way home
mom : Bread? At home still got ma...
me : At home 1 is bun, now i want bread...as in Gardenia bread
mom : sot 1 la u

Conversation #3

me : Ooh b, let's go Jusco pleasee
[After 30 minutes in the cookies section]
Bb : Oi g, choose 1 and pay k...it's all the same..
me : No, this is Digestive biscuit, and this is chocolate chip cookies...aih...i want all of them

yes....i can be pretty crazy over cookies and buns and breads....and if i think i'm overconsumed of breads, buns and cookies, i can starve for a day and resume my binge eating on cookies and buns again...haha...i'm one siao cha bo

Stuff my mouth with buns and cookies, i'll be the eeeeeeeeeepiest gal on earth ;>

Hope you guys out there will enjoy reading my nonsense as well as salivate over the food i bake and cook in future!!....kekekekek (ceh perasan betul)

Till then....ciaozzz